Category: Holidays

American Celebration T-Shirts

Hey friends!

Here in Utah, we like to celebrate America for the entire month of July. Actually, we have Pioneer Day on July 24th, but we keep all of our Americana decor up all month to celebrate.

Pioneer Day celebrates the day when the pioneers arrived in Utah and settled the area. In the city I live in, we also have our annual city celebration: Fiesta Days. So it’s like double celebrations.

Each summer I usually buy my kids a patriotic outfit to wear during the July celebrations in town. This year I couldn’t find anything that I loved, so I didn’t get anything for the 4th of July for my kids to wear (plus, my son was at Stadium of Fire in his scouting uniform, so he wouldn’t have gotten to wear it anyway).

About 4 years ago, I saw a photo of a cute fabric painted t-shirt someone had made for their child. It looked easy enough, and I’d just gotten a Silhouette Cameo so I made my own using a vinyl sticker. I made them large, so they could grow into them. Well, my kids are small-ish, and so they just barely outgrew them this last winter! I figured, it was time to pull out the fabric paint and make them again! My current laptop doesn’t have my Silhouette Cameo software on it yet, so I had to figure out a work around. I’ve used freezer paper before in a pinch, so that’s what I did (see below) this time.
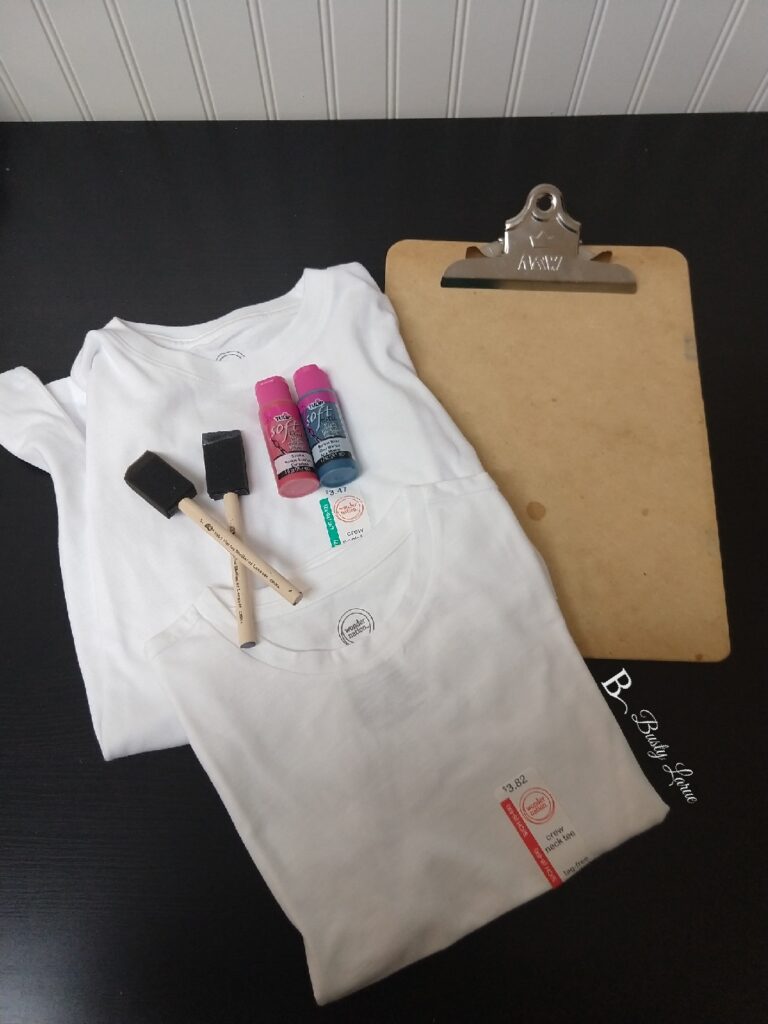
SUPPLIES:

  • Solid color t-shirt in your child’s size
  • Fabric paint in red and blue (you can add in white if you’re doing a shirt colored other than white)
  • Foam paint brushes
  • Cardboard or something to put in the shirt so the paint doesn’t bleed through
  • Freezer Paper

A few notes about the supplies I used:

  • I bought my t-shirts from Walmart. They are tagless, Wonder Nation brand. I paid less than $4 each at the time of purchase. They feel really nice, and I’ve always been pleased with the Wonder Nation quality since Walmart picked up this brand. 
  • I used Tulip brand fabric paint. I’ve used it before, and it washes well.
  • I used a clipboard to separate the layers of my t-shirts. The paint will bleed through a little, so you don’t want it to get on the back of the shirt. A piece of cardboard, cereal box, whatever you have will work fine for this, though. It just happens that is what I had lying around at the time.

PREPARING THE T-SHIRTS

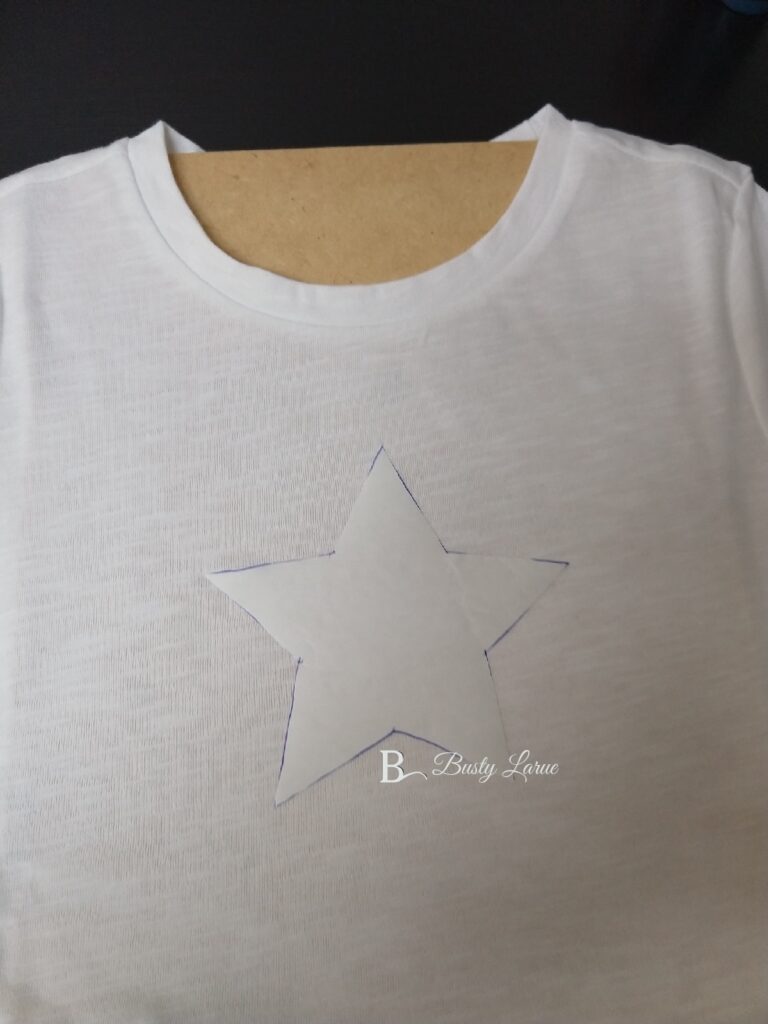
  • First, you need to cut out a star shape from the freezer paper. You can print out a clip-art online or freehand it yourself.
    • Like I said earlier, the last time I made these I used my Silhouette Cameo and cut out star shapes from vinyl. This was super fast and easy, but if you don’t have that option, freezer paper is a great substitute.
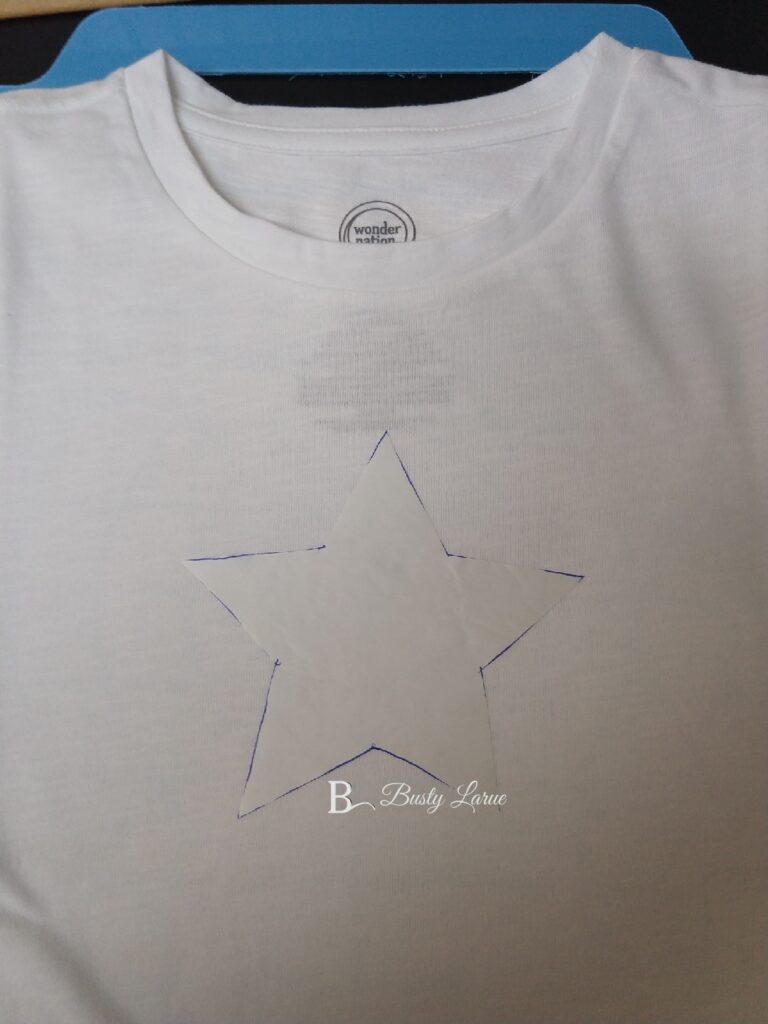
  • Iron the star onto the front of the shirt where you want it. 
    • Make sure you iron the shiny side down. This will adhere the paper to the fabric while you’re painting.
  • Insert the cardboard or clipboard into the shirt to separate the front from the back and prevent bleed through.

PAINTING THE T-SHIRTS

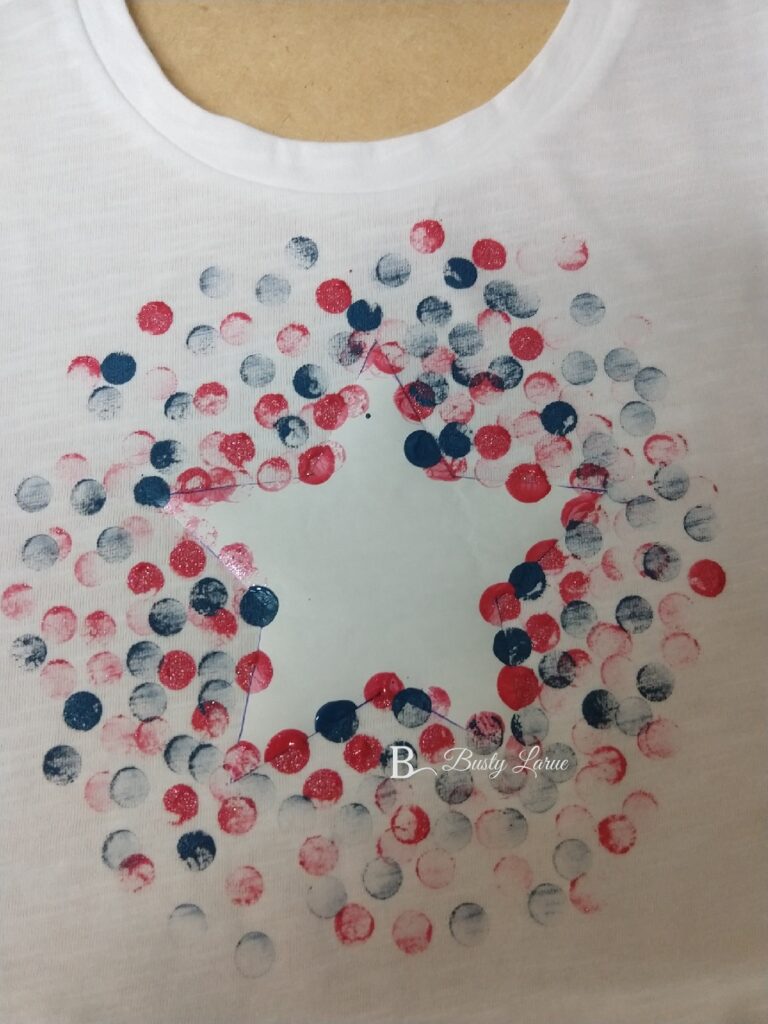
  • Using the bottom end of a foam paintbrush (or anything small and round that you have on hand), dab it in the first color and then dot it across the t-shirt.
    • Make sure you do a few dots along the edge of the star – you’ll see why in a mintue!
  • Using your other brush, repeat step 1 with the remaining color.
  • I like to do heavier dots with thicker paint along the edges of the star, then bloom outwards getting fainter and farther apart for a dispersed effect.

NOTE: Follow your fabric paint’s instructions for setting the paint. Tulip brand says to let it dry for 4 hours and then wash inside out after 72 hours.

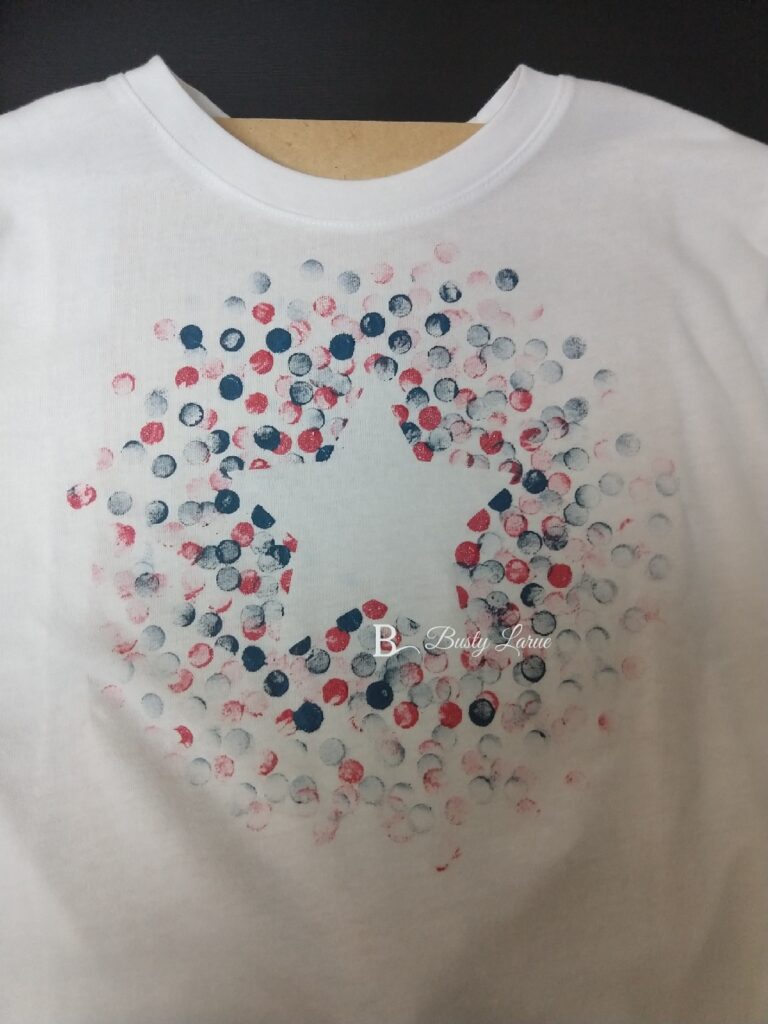
This is the hardest step by far: LET THE PAINT DRY COMPLETELY before taking the freezer paper off the shirt. Peel the freezer paper off, and then you’re good to go.

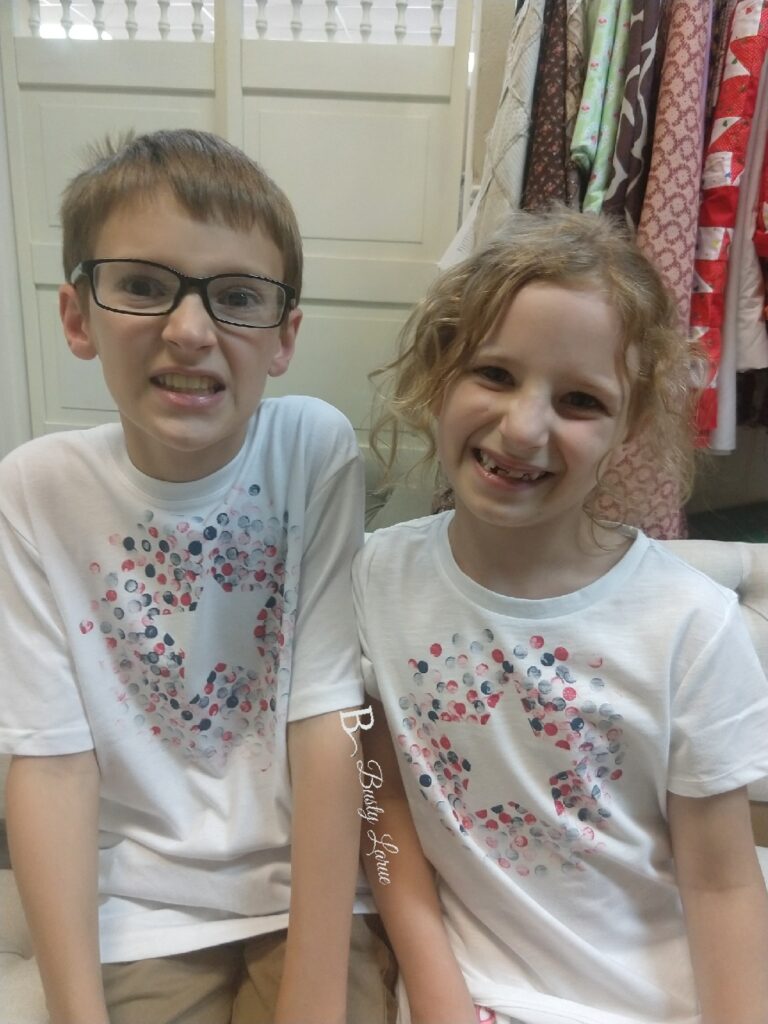
Don’t my kiddos look so excited to be wearing their new, matching shirts?! I love this technique. It’s super easy, and you can do it with any shape. I think I might make some with pumpkins for Halloween!

What shapes do you want to see me try? What holiday should I do next? Vote in the comments!

XOXO,

American Flag Craft

Hey friends!

I’m always looking for a super fun, super easy craft for my kids to do. Sometimes, though, we get started and then I realize it isn’t as super fun or as super easy as I thought it would be. This is one of those crafts. In theory, it looked fun and easy, but in reality, there was a lot of waiting time and it was pretty involved as far as parental supervision would be concerned. I’m kind of glad I did a trial run of this one, for sure!

I’ve seen several tutorials online for pieces similar, but I decided to do mine a little differently. Here’s how I made my Wavy Sticks American Flag!

SUPPLIES:

  • Wavy Craft Sticks – you’ll need 8 to complete this project
  • Craft Paint in Red, White, and Blue
  • Paint Brushes
  • Wooden Craft Star
  • Hot Glue Gun

A few notes on the supplies:

  • I bought everything for this project at Walmart. It was pretty cheap.
  • The most expensive items were the wavy craft sticks ($3) and the wooden craft stars (around $2-3, if I remember right)

PAINTING THE CRAFT STICKS

  • You’ll need 6 of the wavy sticks.
    • Paint 3 white
    • Paint 1 red
    • Paint the other 2 half red, half blue – but WAIT! More instructions to follow on this one!
  • Paint the craft star white

MAKING THE FIELD OF BLUE

  • Line up the 3 sticks that will be half blue and half another color (red or white).
  • Eyeball where you want your field of blue to end.
    • If you want it to be exact, you can use a ruler and measure, but I just drew a line approximately where I wanted it to go that was close on all 3 sticks.
  • Paint the left half of these sticks blue, and the right half either red or white.
    • If you painted 3 sticks white, as in the steps above, just add another coat of white on.

The paint I used said to wait 1 hr between coats, but I really probably only waited about 30 minutes. I did a total of 3 coats. Be careful when you paint the field of blue to make sure that you keep the line fairly even across all three sticks. 

It’s starting to come together now! This is where I let everything dry overnight, or if you’re doing this in the afternoon, at least a few hours. You want it to be super dry when you hot glue on the back supports. But, before we can glue the supports on, we have to measure them!

MAKING THE BACK SUPPORTS

  • Line your sticks up the way they’re going to be when you put it all together. 
    • Alternate red and white stripes, and make sure you have the blue on the left side!
  • Lay another stick next to the flag. This is your back support
  • Mark just above the bottom of the last wavy stick. You don’t want your support sticks hanging out from behind.
  • Cut off the excess at the line you marked.

Now we’re going to hot glue them together. If you don’t want much of the back supports showing through (since we didn’t paint them at all), then you’ll want to make sure you’re gluing them on at the fat part of the curvy sticks. 

This is really important: MAKE SURE YOUR BLUE IS ON THE CORRECT SIDE WHEN YOU START GLUING!! (Yes, I may have had a mini heart attack when I started because I thought I did it backwards.) When you’re done, it’ll look like this:

Glue the white star onto the field of blue. Once the glue is dried, you’re done!

There are lots of ways you can hang this. If you want a fun decoration for your fridge, I’d recommend gluing 2 magnets onto the support sticks on the back. Or, you can glue a small dowel across and tie some jute/twine around it to hang. Me? I just hung mine on a little nail I had in my wall.

It’s definitely a fun craft, but one that the kids probably wouldn’t stick with through to the end. All that waiting for paint to dry will probably drive my kiddos crazy, so I won’t be making more of these for them. But, I now have a fun flag to hang on my wall! Have you tried this craft, or something similar? I’d love to hear about them in the comments!

XOXO,

Independence Day Bandana Wreath

Hey friends!

Do you ever get Pinterest overload? Or feel like you’ve fallen down the Pinterest rabbit hole? It happens to me all the time. Actually, the other day I had some downtime and was perusing the Pinterest boards to get some ideas for 4th of July decor, and then it was time to go to bed! Pinterest has a lot of super cute ideas, but I’m really into the simple and easy projects. We don’t own our home, we just rent, so there’s not a ton of DIY stuff we can do unless it is temporary, like for holidays! I also work full time outside of the home, so any project that is going to take me forever (or longer than an afternoon) to complete, automatically gets passed up. I am all about quick, easy, and something that’s not going to lose my interest because — SQUIRREL!! Yep, there I go.

I have project ADD bad!

Anyway, during my perusal of Pinterest, I found this super cute craft project that was posted by Glue Dots. I thought, that would be so easy to make, and I could pick up some paint sticks for FREE from my local hardware store.

But, then I remembered reading a post about how crafters are stealing their supplies by taking “free” samples and items and then using them to craft. (Read this article and this article – both have really great ideas on this subject). Anyway, this project calls for 10 paint stirring sticks.

10.

Now, I’m not going to go into my hardware store, buy ZERO cans of paint, and then ask for 10 stirring sticks for free. That’s not going to happen, because I’m not that entitled. However, I may go into my local hardware store and ask if I could purchase 10 stirring sticks. I could also just look on Amazon. (I looked, and you can get between 40-100 stirring sticks for under $20!!)

Update: I found a substitute for paint sticks that was completely reasonable at my local Walmart in the craft aisle. They’re curvy 8 inch sticks that look like paint sticks, but they were the PERFECT size for this project. You can find that post here!

Anyway, one thing led to another with project after project finding it’s way to my Pinterest board, and well, here we are. I now have 2 wreaths for the 4th of July that I really don’t even need, but….they are super cute!

The project I’m going to share today is an Independence Day Bandana wreath.

SUPPLIES:

  • 7 white bandanas
  • 7 red bandanas
  • 5-6 blue bandanas
  • 16-18 inch wire wreath form

A few notes on the supplies:

  • I bought my wreath form from my local Joann’s, using a coupon. But, you can also buy these sames forms from some Walmart stores as well.
  • I bought all of my bandanas from Walmart. They were under $1/each, and were the really stiff kind. Normally, for a project where someone is going to wear a bandana, I prefer a softer fabric, but these being stiffer were perfect for this project.

PREPARING THE BANDANAS:

  • Take each bandana out of the packaging. Mine were stapled to the cardboard with some pretty heavy duty staples. I had to carefully use a knife to straighten the ends of the staples and then pry them off. Please be careful! It hurts to stab yourself with your tools (ask me how I know).
  • Fold the bandana in half. It doesn’t have to be perfect, because some of the bandanas aren’t exactly square, but get it as close as you can.
  • Cut the bandana in half. If your scissors are sharp enough, you should be able to run them from the bottom to top no problem; otherwise, just cut carefully along the fold line.
  • If there are tags on the bandanas, make sure you remove them. Mine tore off easily, but you may have to trim it off close to the hem, depending on the brand you bought.

MAKING THE WREATH:

  • Starting with a piece of red bandana, gather it up in your hands, trying to tuck the cut edge on the inside.
  • Fold it in half, and lay it under the wire wreath form.
    • I went under 3 of the 4 wire pieces on my form, leaving the furthest outer ring for hanging.
  • Pull the 2 ends of the bandana through the loop, pulling tightly. Make sure the ends are even. This can be a little tricky, and you may need to play around with it a few times.
  • Alternate between red and white until 75% of the form is covered. When you get to a cross piece, I like to make sure that my “knot” goes over it. This is a little tricky, and I have to actually insert the ends from the outside instead of putting the loop through from the inside, but it covers the cross wire completely and keeps everything evenly spaced. Play around with it and see what you like best. After all, it’s your wreath!
  • Fill the last quarter of the wreath form with the blue bandana pieces only.

When you’re done, your wreath will look like this:

I didn’t like how empty the middle was, so I got together with my friend, Marie. She does awesome chalk designs through Chalk Couture. She has an Facebook group (find it here) and you can buy her products to make your own stuff off her website here. Check out the cute little chalkboard she made me! Isn’t it the cutest thing ever? I love how she did an ombre from the white to red.

I wasn’t sure how to attach the chalkboard to the wreath, but then I realized: All I needed was a nail, and I could hang them both off it! I hung the chalkboard from the nail, then placed the wreath over it. Super cute, right?

Didn’t it turn out so cute? It was super simple to make (the hardest part was seriously pulling out the industrial staples from the bandanas!), and I think it only took a couple of hours start to finish. I thought about putting it on my front door, but we face full West, and I didn’t want it to get sunbleached. I have the perfect spot in my living room on a big, empty wall, and it looks great there!

Stay tuned for some other fun Independence Day projects!!

XOXO,